9 月 18, 2026
UV Lamp End Darkening: Causes, Inspection and Replacement Guide
Learn what causes UV lamp end darkening, how to inspect electrode areas and when service teams should replace a darkened UVC lamp.
Dark or gray areas near the ends of a UV lamp are common inspection findings for maintenance teams. Some end darkening develops gradually during normal service, while rapid or uneven darkening can point to frequent starting, an electrical mismatch or another system problem. This guide helps overseas distributors and service teams evaluate end darkening on UV germicidal lamp tubes and decide what to check before ordering replacements.
What is UV lamp end darkening?
End darkening is a gray, brown or black deposit that appears inside the quartz or glass tube near an electrode. During operation and repeated starts, small amounts of electrode material can be deposited on the inner tube wall. The appearance may become more visible as the lamp accumulates hours and switching cycles.
A dark end does not automatically mean that the lamp has failed. The important questions are how quickly the darkening appeared, whether both ends look similar, whether starting remains stable and whether measured UV output still meets the system requirement.
Normal aging versus a possible system problem
Gradual and reasonably even darkening
When mild darkening develops slowly on both ends over a long operating period, it may be consistent with normal electrode aging. The maintenance record, total operating hours and UV sensor trend should be reviewed together. The UV lamp lifespan and replacement interval guide explains why visible appearance should be combined with runtime and performance data.
Rapid darkening after installation
If a new lamp becomes dark after a short period, inspect the electrical system and operating conditions. Possible contributors include a mismatched ballast, incorrect lamp current, repeated failed starts, loose contacts or excessive switching. Do not approve a replacement model only because it fits mechanically.
Darkening concentrated at one end
Strong one-sided darkening can justify checking the lamp holder, connector, wiring and electrode circuit on that end. Compare the installation with an approved working unit and look for heat damage, poor contact or an incorrect pin connection. The UV lamp base and pin layout guide can help service teams record the connection details.
Darkening with flicker or failed ignition
End deposits combined with flickering, cycling or delayed starting should be treated as a system-level symptom. Check the lamp, ballast, holders and supply conditions before fitting another lamp. Use the UV lamp troubleshooting guide to separate common electrical and maintenance causes.
Factors that can accelerate end darkening
Frequent start-stop cycles
Starting is a demanding part of lamp operation. Equipment that switches repeatedly throughout the day may age electrodes differently from a system that runs continuously. OEM buyers should provide expected switching frequency when selecting a lamp and ballast.
Incorrect ballast or operating current
The UV electronic ballast must match the lamp’s electrical design. An incorrect starting method or operating current can cause unstable ignition and premature electrode wear. Buyers can review the data fields in the operating current and ballast compatibility guide before sample approval.
Poor electrical contacts
Loose pins, damaged holders, contaminated contacts or degraded cables can make starting unreliable. Inspect the ceramic caps, pins, sockets and cable terminations. Replace discolored or mechanically loose UV lamp accessories rather than moving the same problem to a new lamp.
Temperature outside the intended range
Water temperature, airflow and reactor cooling affect lamp operation. A lamp running too cold or too hot may not perform as expected even if the electrical parts are correct. For water systems, also check whether the quartz sleeve specification and flow conditions match the approved design.
Repeated unsuccessful starting attempts
A control system that repeatedly attempts to ignite a failed or incompatible lamp can add stress without restoring normal output. Review restart logic and alarm handling so the equipment stops and requests service after the permitted number of attempts.
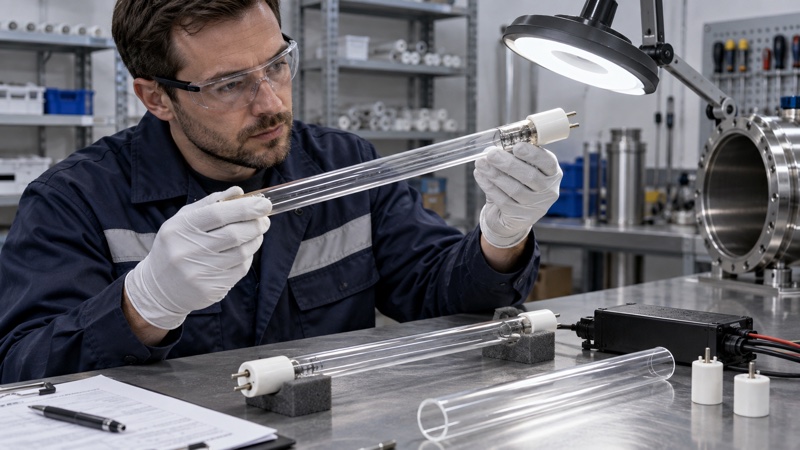
How to inspect a darkened UV lamp safely
1. Isolate power and allow the lamp to cool
Follow the equipment manufacturer’s lockout and service procedure. Never inspect an operating UVC lamp with unprotected eyes or skin. Lamps and reactor parts may remain hot after shutdown.
2. Remove the lamp without stressing the quartz
Support the tube along its length and avoid twisting the ceramic ends. If the system uses a quartz sleeve, inspect the sleeve separately for fouling, cracks and seal condition.
3. Photograph both ends under the same lighting
Use a neutral background and consistent distance. Photograph the model marking, both electrode areas, bases and pins. Side-by-side images with a known new lamp make changes easier to assess across maintenance visits.
4. Record operating and switching history
Note the installation date, accumulated hours, approximate number of starts, ballast model, alarms and recent maintenance. Darkening has more diagnostic value when it is connected to a timeline.
5. Compare performance data
Review UV intensity, startup behavior, ballast alarms and treatment performance. A visual check cannot confirm germicidal output. Use the system’s validated monitoring method and replacement threshold.
When should a darkened UV lamp be replaced?
Replacement is appropriate when the lamp has reached the planned service interval, fails to start reliably, produces output below the accepted threshold or shows abnormal darkening together with electrical or physical defects. A lamp should also be removed if the quartz is cracked, the base is loose or the pins are damaged.
Mild darkening by itself may not justify an emergency replacement if the lamp operates normally and performance remains within specification. However, it should be documented and checked again at the next service interval. Maintenance decisions should follow the equipment validation and local operating procedure.
What to check before installing the replacement
Confirm the full model and dimensions
Record the model suffix, wattage, tube diameter, total length, base and pin layout. For non-original replacements, send these details with photos to the supplier. BIOSUN’s replacement UVC lamp range can be matched against existing system information.
Verify the ballast and wiring
If premature darkening occurred, do not install a new lamp until the ballast output, connectors and wiring have been checked. Otherwise the replacement may develop the same symptom.
Clean and inspect the sleeve
A fouled sleeve reduces UV transmission and can make a working lamp appear ineffective. Clean the sleeve using the approved method and replace damaged seals. Do not use abrasive tools that scratch the quartz surface.
Set a new maintenance baseline
Record the new lamp batch, installation date, ballast model and initial UV reading. Photos at installation provide a useful reference for later inspections and warranty discussions.
Improve spare-parts planning with inspection records
Distributors and service companies should code each lamp, ballast and holder as a verified combination. Keep field photos and failure descriptions linked to the model so purchasing teams can distinguish normal end-of-life replacements from repeat system faults.
The UV lamp spare-parts stocking guide provides a structure for minimum stock, model mapping and service-kit preparation. This is especially useful when several visually similar lamps are used across a customer fleet.
FAQ
Does blackening mean the UV lamp has no output?
Not necessarily. End darkening can occur while a lamp is still operating. Use runtime, startup behavior and validated UV output data to make the replacement decision.
Why did a new UV lamp darken quickly?
Check ballast compatibility, operating current, wiring, holders, switching frequency and restart behavior. Rapid darkening should be investigated before another replacement is installed.
Can the deposit inside the lamp be cleaned?
No. Internal electrode deposits are not accessible. External dirt on the lamp or quartz sleeve can be cleaned only according to the equipment manufacturer’s maintenance procedure.
What photos are useful for replacement matching?
Send the full lamp, model marking, both darkened ends, bases, pins, ballast label, connector and installation position. Include dimensions and operating history where available.
Send your lamp photos for BIOSUN replacement matching
BIOSUN supports overseas distributors and service teams with UV lamp model identification, ballast compatibility review, sample approval and spare-parts planning. Send clear lamp, base and ballast photos through the BIOSUN contact page for a practical replacement review.
Need a UV lamp quotation?
Send your model list to Baiousen and we will review the lamp matching details by email.
Send Inquiry